How to Pack Electronics & Home Office
Last month I packed a home office for a graphic designer relocating from a loft in the Arts District to a house in Los Feliz. He had two 32-inch monitors, a Mac Studio, a color-calibrated reference display worth about $3,000, a laser printer, a Wacom tablet, three external hard drives containing ten years of client work, and roughly forty cables connecting everything. When I asked him how he'd planned to pack it, he showed me a large cardboard box and a roll of bubble wrap. One box. For all of it. I spent the next three hours showing him why that would have been a $5,000 mistake.
I'm Sarah, a Packing Specialist at Green Moving, and home office packing has become one of the most important parts of my job. Since the pandemic, nearly every home I pack has a dedicated office setup — often with equipment worth more than the furniture in the rest of the house combined. Yet most people pack their electronics last, in a rush, with whatever materials are left over. This guide is the system I use on every job — step by step, item by item — so your tech arrives at the new place working exactly the way it did at the old one.
Before You Touch a Single Cable: The Photo Step
This is the step most people skip, and it's the one that causes the most frustration at the new place. Before you unplug anything — before you move a single cable — take photos. Lots of photos.
Behind the desk: Get down on the floor and photograph the back of every device, showing which cable goes into which port. Take wide shots that show the full cable layout, and close-ups of individual connections. If you have a USB hub, photograph which devices are plugged into which ports.
The power strip and surge protector: Photograph the full strip showing which plug belongs to which device. If your cables aren't labeled (most people's aren't), this photo is the only thing that will tell you at the new place that the thin black cable in port 3 goes to the monitor and not the printer.
The router and modem: Photograph the back panel with all connections visible. Note which ethernet cables go to which ports. If your ISP setup is complicated (mesh systems, extenders, switches), photograph every node location and connection.
Save these photos in a dedicated folder on your phone — not in your camera roll where they'll get buried. I name mine "Office Cables [Date]" and I tell every client to do the same. When you're crouched behind a desk at 9 PM in your new house trying to figure out why the monitor won't display, these photos are worth their weight in gold.
Cable Management: The System That Saves Hours
After photos, cables are the next priority — because cables are what people lose, tangle, and misidentify during a move. Here's my system:
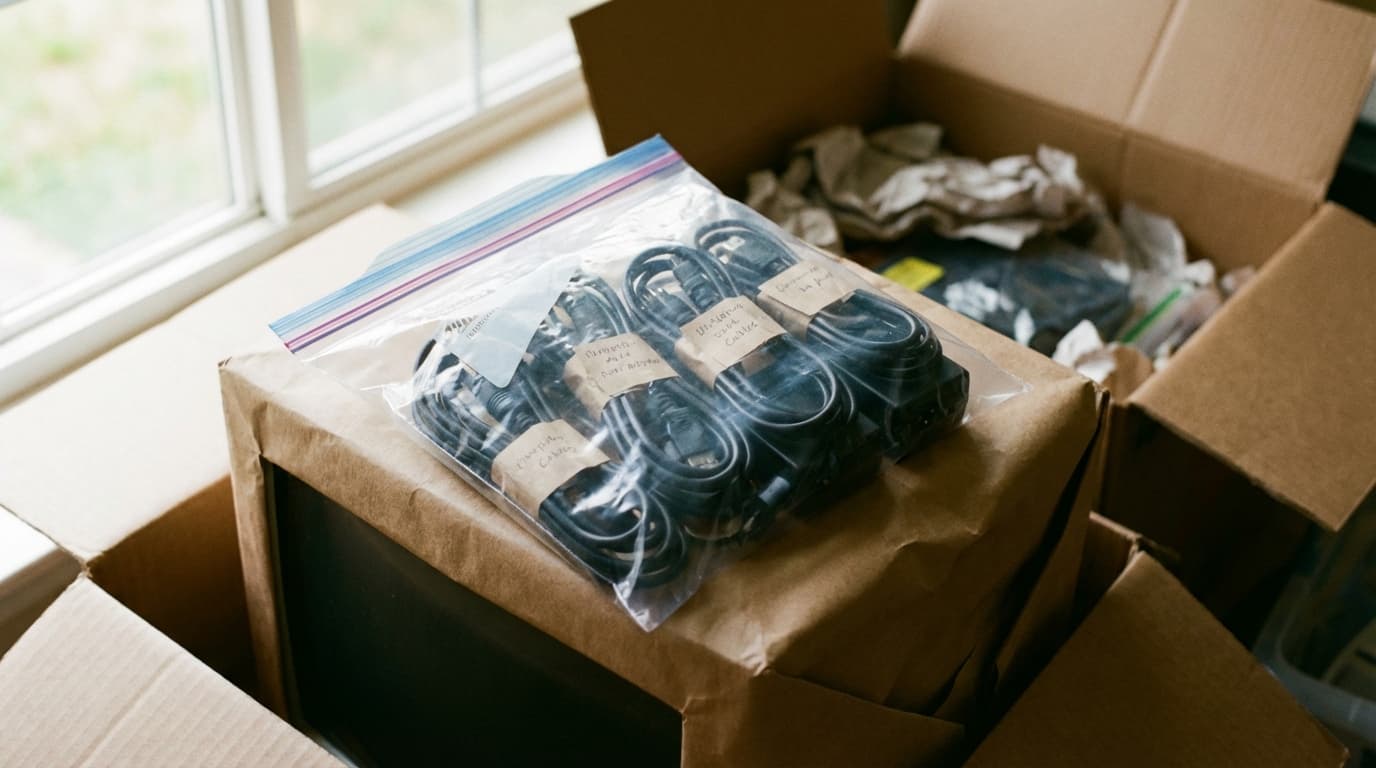
Disconnect and label every cable. Use masking tape flags — tear off a 3-inch piece of masking tape, fold it around the cable end, and write what it connects to on the flag. "Monitor 1 power," "Monitor 2 DisplayPort," "Printer USB," "Desk lamp." Yes, this takes 15–20 minutes. It saves 2+ hours of troubleshooting at the new place.
Coil each cable individually. Don't bundle all cables into one tangled mass. Coil each cable using the over-under method (loop it in alternating directions to prevent kinking), secure with a twist tie or small rubber band, and keep the label visible.
Bag cables by device. Each device gets its own gallon-size zip-lock bag containing all its cables, adapters, and accessories. The monitor bag has the power cable, the display cable, and the USB upstream cable. The printer bag has the power cable and the USB cable. Label the bag with the device name.
Pack all cable bags together in one clearly labeled box. I use a small box labeled "OFFICE CABLES — OPEN FIRST" and I make sure it goes in the client's personal car, not the truck. If you unpack nothing else on move-in night, you can at least set up your computer and get online.
Packing Monitors: The Most Common Damage Point
Monitors are the most frequently damaged electronics in a move, and the reason is simple: they're large, fragile screens that people try to pack flat in oversized boxes where they shift and crack in transit.
The original box method (best option): If you kept the original monitor box with the molded foam inserts, use it. Those inserts were engineered specifically for your screen. Pack the monitor back into the foam exactly as it came, seal the box, and label it "FRAGILE — MONITOR — THIS SIDE UP."
The no-original-box method (most common reality):
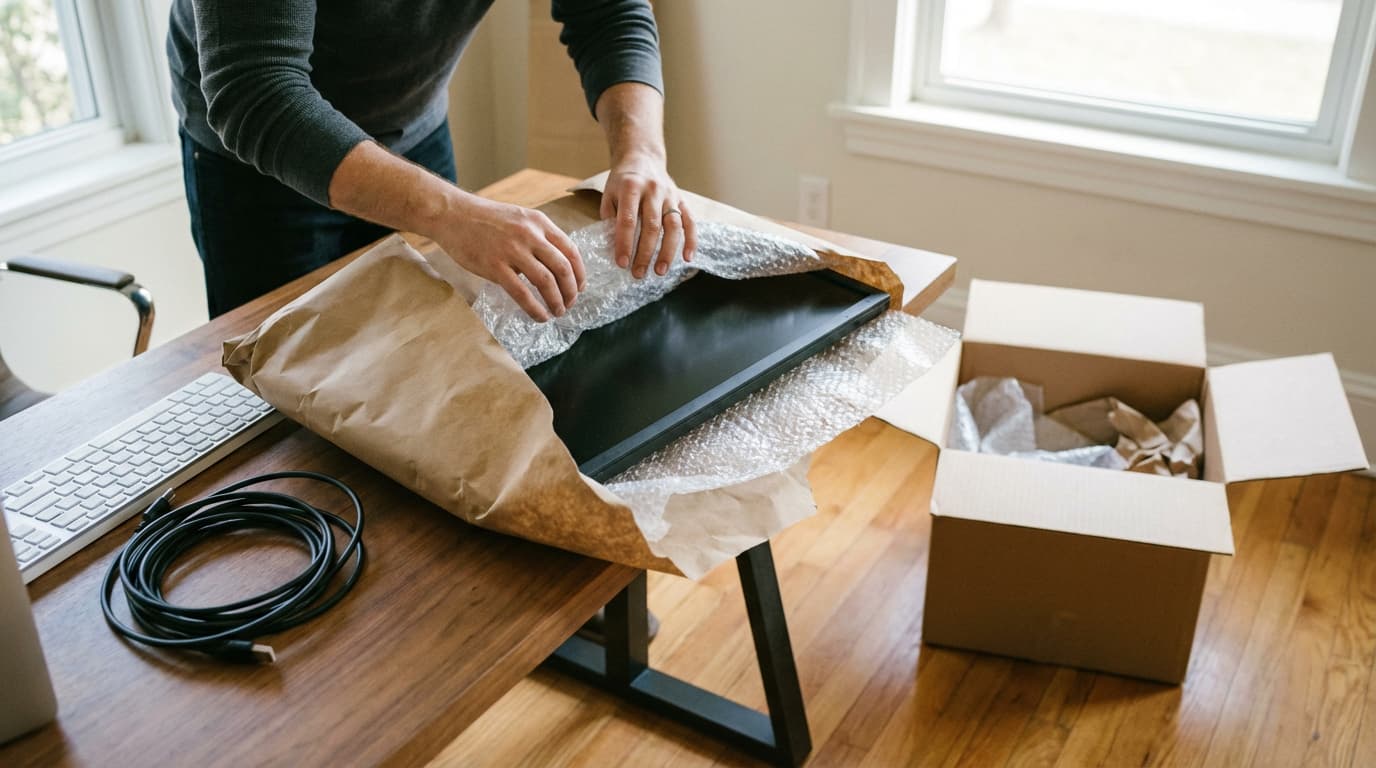
Step 1: Clean the screen with a microfiber cloth to remove dust that could scratch under pressure.
Step 2: Place a clean microfiber cloth or soft cotton pillowcase over the screen face. This prevents any packing material from contacting the display surface directly.
Step 3: Wrap the entire monitor in 2–3 layers of recycled kraft paper, securing with paper tape. The paper provides scratch protection and a cushioning base layer.
Step 4: Wrap the paper-wrapped monitor in a moving blanket or thick bath towel, securing with rubber bands or packing tape over the blanket (never tape directly on the monitor surface).
Step 5: Place the wrapped monitor upright (standing, not flat) in a box that's only slightly larger than the monitor. Fill all gaps with crumpled paper or clothing. The monitor should not be able to shift in any direction inside the box.
Critical rule: Monitors travel upright, never flat. A flat monitor in a stack of boxes has weight pressing on the screen. An upright monitor distributes pressure through the stand mount and frame, which are designed to bear weight. This single rule prevents the majority of screen cracks during moves.
🖥️ Got a complex home office to move? Green Moving's packing services team handles electronics with professional technique and materials. Call (949) 266-9445 or request a free quote — we'll make sure your tech arrives intact.
Packing Computers: Desktops, Laptops, and All-in-Ones
Desktop towers: Remove the side panel and check if your GPU (graphics card) has a heavy aftermarket cooler or is a large card. Heavy GPUs can snap off the PCIe slot during transit vibration. If yours is large, remove it, wrap it in anti-static wrap or its original bag, and pack it separately in a small padded box. For the tower itself, wrap in a moving blanket, place upright in a box with crumpled paper filling all gaps.
Laptops: This is the one item I always tell clients to carry in their personal bag — never in the moving truck. Laptops are high-value, contain irreplaceable data, and are small enough to carry. Put it in a padded sleeve, put the sleeve in your backpack, and keep it with you.
All-in-one computers (iMac, etc.): Treat these like monitors with extra care. The original box with foam inserts is ideal. Without it, use the screen-protection method above, wrap the entire unit in a moving blanket, and box it upright. iMacs are particularly vulnerable because the screen IS the computer — a cracked display means a non-functional machine.
External hard drives and SSDs: These contain your data. Pack them in individual padded pouches or wrap each one in bubble wrap and place in a small box labeled "FRAGILE — DATA." Carry this box in your car. A hard drive that takes a bad impact in the truck isn't just a broken device — it's potentially lost files, photos, and work.
Printers, Scanners, and Peripherals
Printers: Remove ink or toner cartridges before packing. Inkjet cartridges can leak during transit — I've seen black ink saturate the inside of a printer and ruin the print head mechanism. Remove cartridges, cap them (or put them in individual zip-lock bags), and pack them separately. For the printer body, secure any moving parts (paper trays, scanner lids) with painter's tape (not packing tape — it leaves residue). Wrap in kraft paper, then a moving blanket, and box it.
Laser printers: Remove the toner cartridge and pack it in its own bag. Toner powder is messy and potentially damaging to other items if a cartridge cracks. The printer itself is heavy — use a sturdy box and fill all gaps to prevent shifting.
Scanners and all-in-ones: Lock the scanner carriage if there's a transport lock switch (check your manual — most flatbed scanners have one). This prevents the scanning element from slamming around inside the unit during the move.
Webcams, microphones, and audio equipment: Small peripherals go in their own zip-lock bags with their cables, then into a shared "peripherals" box. Condenser microphones are genuinely fragile — wrap them in a thick sock or small towel, then place in a padded box. If you have a microphone shock mount, detach it and pack separately.
Desk accessories: Monitor arms, keyboard trays, cable management clips, and desk clamps — disassemble and bag all hardware. Photograph the mounting setup before disassembly so you can replicate it at the new desk.
The Data Backup Rule
I'm a packing specialist, not an IT professional, but I've seen enough data disasters during moves to make this an absolute rule: back up everything before you start packing.
An external hard drive gets dropped. A laptop gets rained on during loading. A desktop's hard drive develops bad sectors from truck vibration. These aren't hypotheticals — I've witnessed all three.
Before packing day: Upload critical files to cloud storage (Google Drive, iCloud, Dropbox, OneDrive). Create a local backup on an external drive that you carry in your personal car — not the moving truck. For irreplaceable data (photos, client work, business records), have both a cloud backup AND a local backup. The 3-2-1 rule applies: 3 copies of your data, on 2 different media types, with 1 stored off-site.
This takes an hour. Replacing lost data takes forever — if it's even possible.
Setting Up at the New Place: The Right Order
Unpacking your home office in the right sequence saves time and prevents the "nothing works and I don't know why" frustration:
Step 1: Internet first. Set up your router and modem. Confirm you have a working internet connection before you touch anything else. If your ISP needs to install or activate service, schedule this for move-in day or the day before. Many people forget this and end up working from a phone hotspot for three days.
Step 2: Desk and chair. Position your desk in the new office before you start connecting equipment. Moving a fully connected desk setup is exponentially harder than moving an empty desk.
Step 3: Power strip and surge protector. Set up your power infrastructure at the desk. Check that the outlet you're using is grounded — older LA homes (pre-1960s, common in Silver Lake, Echo Park, Highland Park) sometimes have ungrounded outlets that can damage sensitive electronics. A $10 outlet tester from Home Depot confirms this in seconds.
Step 4: Monitors first, then computer. Mount or position monitors, then connect to the computer. Use your cable photos from the old setup to replicate the connections. This is where the labeled cable bags pay off — you open the "Monitor 1" bag and every cable you need is right there.
Step 5: Peripherals. Printer, scanner, webcam, mic, speakers — add them one at a time, confirming each works before adding the next. This way, if something doesn't work, you know exactly which device or cable is the problem.
Step 6: Cable management. Once everything is working, take 20 minutes to route cables neatly. Use cable clips, ties, or a cable management tray under the desk. A clean cable setup is easier to troubleshoot, easier to clean, and less likely to get accidentally pulled out.
The Eco-Conscious Home Office Move
Electronics generate specific waste streams that deserve conscious handling. When you upgrade equipment during a move — which many people do — don't trash the old gear.
Working electronics: Donate to organizations like Human-I-T (LA-based, refurbishes and distributes tech to underserved communities) or Goodwill.
Non-working electronics: Recycle through Best Buy's free e-waste program, any city-sponsored e-waste collection event, or certified e-waste recyclers. Never put electronics in the trash — they contain heavy metals and toxic materials that contaminate landfills.
Packing materials: If you use recycled kraft paper and paper tape for your electronics packing, everything goes straight into your recycling bin after unpacking. Green Moving commits 1% of every move to California environmental causes, and minimizing tech waste is one of the easiest ways to make your own move more responsible.
FAQ
How do I pack a monitor without the original box? Cover the screen with a microfiber cloth or soft pillowcase, wrap in 2–3 layers of kraft paper, then wrap in a moving blanket or thick towel. Place upright (not flat) in a snug box with crumpled paper filling all gaps. The monitor should not shift in any direction inside the box. Never lay a monitor flat — upright positioning prevents screen cracks.
Should I remove the GPU from my desktop computer before moving? If you have a large or heavy graphics card (most modern gaming or professional GPUs), yes — remove it and pack it separately in anti-static wrap. Heavy GPUs can snap off the PCIe slot from vibration during transit. If your GPU is a standard-size card, securing the tower upright with plenty of cushioning is usually sufficient.
Can movers pack my home office electronics? Yes — professional packing crews handle electronics regularly. At Green Moving, our packing team uses specialized techniques for monitors, computers, and peripherals. We recommend professional packing for home offices with high-value equipment like color-calibrated displays, audio recording setups, or multi-monitor workstations.
How should I transport external hard drives during a move? Always carry external hard drives and SSDs in your personal car, never in the moving truck. Wrap each drive in bubble wrap or a padded pouch, place in a small labeled box, and keep it temperature-controlled. Back up all data to cloud storage before the move as an additional safeguard.
What should I do with old electronics I don't want to move? Donate working electronics to Human-I-T or Goodwill. Recycle non-working equipment through Best Buy's free e-waste program or city-sponsored collection events. Never put electronics in the regular trash — they contain hazardous materials that require specialized recycling.
Moving your home office? Green Moving's packing specialists handle monitors, computers, and full office setups with professional care. Call (949) 266-9445, email sales@greenmovingla.com, or get your free quote. Licensed & insured — CAL-T 201327.
Booking early ensures you get your preferred date and often better rates.
Always ask for a detailed written estimate before signing.
3-bedroom house: $1,200–$2,200 (5–7 hours)
Prices include 2–3 movers, truck, and basic insurance.